The Other Skyline: Wet Pavement as Britain’s Improvised Mirror
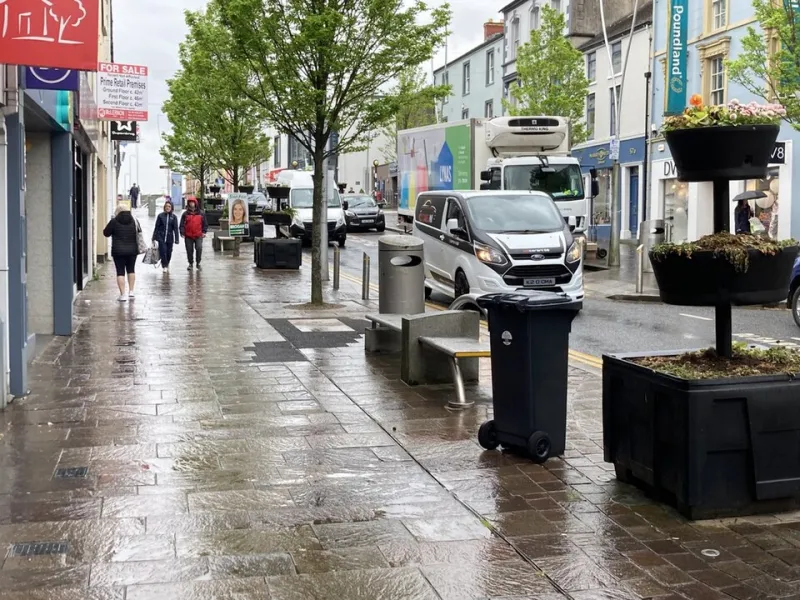
Photo: Kenneth Allen , CC BY-SA 2.0, via Wikimedia Commons
British rain has a reputation problem. We treat it as the enemy of a day out with a camera, something to be waited out under a bus shelter with a lukewarm coffee. But any street shooter who has crouched by a kerb after a downpour knows the truth: wet pavement is the largest, cheapest and most surprising reflector in the country. It doubles the city. It gives you a second skyline, upside down and slightly wobbly, right there between the double yellow lines.
This is not about chasing perfect mirror lakes in the Lake District. It is about the ordinary stuff — station forecourts, high street granite, the puddle outside Greggs — and using it deliberately. Olympus kit is well suited to the job: small bodies, flippy screens, stabilisation that lets you handhold at silly shutter speeds, and weather sealing on the right models. Here’s how to make the wet pavement work for you rather than against you.
Start low, stay low
The first rule is simple: get down. A reflection only reads as a second world when the camera is near the water’s surface. The articulating screen on an OM-1 or OM-5 is your friend here — flip it out, crouch, and compose without lying in a puddle. If you’re using a PEN E-P7, the tilting screen still helps, but you’ll want to be a bit more careful about where you kneel.
You do not need to touch the ground. Use the kerb, a shop step, a bench, the edge of a planter. A low angle from a station forecourt can turn a boring glass frontage into a symmetrical inverted arcade. The trick is to include a sliver of the real world at the top of the frame — a bit of shop sign, a bus stop, a pedestrian’s shoes — so the viewer understands the trick. Without that anchor, the image can look like an accident rather than a composition.
Look for leading lines in the wet: the painted edge of a kerb, a double yellow line, the grout between paving slabs. These lines pull the eye into the reflection and give the frame structure. A wide lens helps — the 8-25mm f/4 PRO or the 8mm fisheye can make a modest puddle feel like a plaza — but resist the urge to go ultra-wide every time. Sometimes a 17mm or 20mm prime gives a more natural, less gimmicky view.
Read the water before you shoot it
Not all puddles are equal. Shallow water gives you texture and broken reflections; deep water gives you a cleaner mirror. Wind is the enemy of both. Look for shelter: under bridges, in shopping arcades, on the leeward side of station buildings, beneath the overhang of a museum. These spots also tend to have smoother, darker asphalt, which reflects better than rough concrete.
Exposure is where people come unstuck. Reflections are usually darker than the scene they reflect — physics, not faulty metering — and wet pavement often mixes bright sky with dark tarmac. If you expose for the pavement, the sky reflection can clip; if you expose for the sky, the pavement goes muddy. Start at around -0.3 to -0.7 EV and check the histogram. You want the reflection’s highlights intact, not blazing white. Shoot RAW and give yourself room in post.
Natural Mode is a good starting point for this kind of work. It keeps the quiet, slightly muted palette that suits British streets, and it stops wet tarmac from turning into a garish oil slick. If you want a bit more punch in the neon and signage, try i-Enhance, but be careful — wet surfaces amplify colour, and a little goes a long way.
Mixed light, mixed problems
Wet pavement is a master of mixed lighting. You’ll get sodium streetlamps, LED shop signs, fluorescent station lights and whatever pale daylight is left, all bouncing off the same surface. Auto white balance will make a decent guess, but it will not be consistent. Set a fixed Kelvin value — around 5000K is a reasonable neutral — and fine-tune later. Or leave it on auto and fix it in post, provided you’re shooting RAW.
At dusk, stabilisation becomes the quiet hero. With an OM-1 and a 17mm f/1.8, you can handhold at 1/15sec and still get a sharp reflection, letting moving people blur into streaks. That blur is not a failure; it’s part of the picture. A completely still street looks like a studio set. A bit of movement reminds the viewer that this is a living city, not a mirror in a showroom.
Kit that doesn’t mind a soaking
Weather sealing matters, but it is not a licence to be reckless. An OM-1 or OM-5 paired with a sealed lens — the 12-40mm f/2.8 PRO, the 8-25mm f/4 PRO, the 20mm f/1.4 PRO — will handle rain and splashes without drama. Wipe the barrel before zooming, keep a microfibre cloth handy, and avoid changing lenses in the open. If you’re using an unsealed body like the PEN E-P7, work from shelter and keep a rain cover in your bag.
A wrist strap is better than a neck strap when you’re crouching by kerbs; it stops the camera swinging into the water when you lean. A small silica gel sachet in your bag helps with condensation when you duck into a warm café. And don’t forget a lens hood — it keeps raindrops off the front element and reduces flare from shop lights.
The reader challenge: Britain’s most surprising upside-down skyline
This winter, Olympus Magazine is asking readers to find the UK’s most unexpected reflected skyline. It doesn’t have to be a cathedral or a skyscraper. A bus shelter reflected in a station puddle, a Victorian arcade upside down in a gutter, a seaside pier mirrored in a rain-slicked promenade — all fair game. One frame, a location, and a short note about why you stopped. No heavy composites; a simple rotate is fine, but tell us if you’ve flipped the image. We’ll feature a selection in the Reader Challenge gallery.
So next time the forecast looks grim, don’t leave the camera at home. Put on a jacket, find a puddle, and get low. Britain is twice as interesting when it’s wet.