Gate, Gap, Gutter: Building a Six-Frame Winter Walk with Olympus
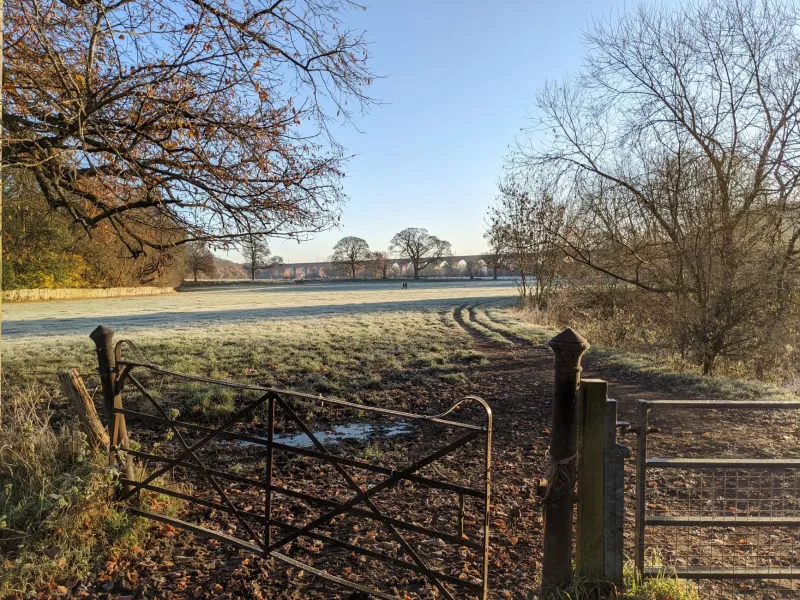
There is a particular kind of British winter light that makes ordinary things look briefly extraordinary. It arrives low and sideways, catches the top bar of a gate, finds the shine on a flooded rut, and turns a scrappy hedgerow gap into a lit doorway. The temptation is to chase the big view. The better project, I think, is to stay down in the mud and photograph the furniture of the path itself.
This is a field project for Olympus landscape shooters who want a reason to walk in the damp months. The brief is simple: one route, one afternoon, six frames. Not six random keepers — six pictures that hold together as a small set. The subject is the stuff we normally walk past: gates, stiles, ruts, fingerposts, gaps, the places where the path changes its mind.
Plan the walk around the light, not the map
Start with a short loop — two to three miles is plenty — and plan it so the best section falls in the last hour before sunset. In winter, that means roughly 3pm onwards in many parts of the UK, depending on where you are. Use an OS Explorer map or a trusted rights-of-way app, and look for a path that runs roughly east–west. That gives you side-light along the route rather than flat front-light or a sun that sits stubbornly in the lens.
A route with a mix of enclosed hedgerow and open field edge is ideal. You want variation in texture: dark thorn, pale grass, wet clay, wooden gate, metal stile. Avoid fields with livestock unless you are confident about the access rules, and give crop fields a wide berth. Winter footpaths can be legally open and practically unwalkable at the same time. Mud is part of the subject, but trespass is not.
Check the forecast for the morning after rain rather than during it. You want saturated ground and a chance of clearing light. Take a headtorch for the walk back, and tell someone your route. This is not heroic mountaineering, but a muddy stile in the dark is still a silly place to turn an ankle.
Kit that can take a wet gatepost
Olympus weather sealing is genuinely useful here, but it is a system, not a force field. A sealed body needs a sealed lens to mean anything. The 12–40mm f/2.8 PRO is the obvious companion, and the 8–25mm f/4 PRO works well if you like wider context. If the forecast is merely grim rather than apocalyptic, a prime such as the 25mm f/1.8 is lighter and faster, but it is not the one to trust in steady rain.
Wipe the body and lens with a microfibre before you change anything. Keep a dry cloth in a zip pocket, not loose in the bag. Avoid pumping a zoom in and out repeatedly in heavy rain; give it a moment under cover if you can. A lens hood helps keep droplets off the front element, and a small silica pack in the bag is cheap insurance. I also carry a wrist strap rather than a neck strap on muddy ground — fewer swinging cameras, fewer gatepost collisions.
For the six-frame set, two lenses are enough. A standard zoom covers the path context, and a short telephoto — the 40–150mm f/4 PRO, or even the 45mm f/1.8 — compresses the hedgerow and picks out details without making you climb every bank. Resist the urge to bring everything. The project is about seeing, not carrying.
The six-frame exercise
The point is not to document every gate on the route. It is to make a sequence that feels like a walk. Try these six beats, in this order, and see what the path gives you.
Frame one: the invitation. A wide-ish view of the path heading away from you, with the low sun somewhere in the frame or just outside it. Keep the horizon level and let the path be the leading line. This is your establishing shot.
Frame two: the gate as portal. Get close enough that the gate fills a third of the frame. Wait for the light to catch the top rail or the latch. If the gate opens onto a bright field, expose for the highlight and let the wood go dark. That contrast is the picture.
Frame three: the stile as geometry. Stiles are all angles and worn edges. Shoot across the steps rather than straight on, and include a bit of the muddy approach. A low angle makes the structure feel bigger than it is.
Frame four: the rut as mirror. Find a flooded wheel rut or a puddle in the gateway and get the camera low. A tilting screen is your friend. Look for a reflection of sky, branch or gatepost, and focus on the reflection rather than the mud. This is where a little patience pays off — wait for the wind to drop.
Frame five: the gap. A hedgerow gap, a broken gate, a place where the path squeezes through. Use it as a frame within a frame. Stand back, use the telephoto end, and let the dark branches surround a lit slice of field beyond.
Frame six: the evidence. A close detail that says winter walk without showing a person: mud on a boot-scraper, a bramble hooked over a fingerpost, water dripping from a gate bar. This is your full stop.
Make the set cohere
Back home, resist the urge to grade each frame differently. Pick one white balance and one contrast curve and apply it across the six. A slightly cooler, muted palette suits wet British winter light, but keep the greens from going nuclear. Crop to the same aspect ratio — 4:3 is the natural Olympus choice, though a consistent 5:4 can feel more like a small portfolio.
Sequence matters. The walk should feel like it moves from open to enclosed, or from wide to close. Put the establishing frame first and the detail last, and let the middle four do the work. If one frame is weak, leave it out. Five strong pictures beat six with a filler.
And please: close the gate, stick to the path where the ground is fragile, and take your litter home. The mud line is a subject worth returning to, but only if the path is still there next winter.